A common questions among Mac uses is can NinjaTrader be installed on a Mac?
YES, NinjaTrader can be installed on a Mac. However, there is no installation file that allows NinjaTrader to be installed directly. NinjaTrader runs on the .NET framework which requires a Windows operating system. Ninjatrader can be run on a Mac by either installing Virtual Machine software or Apple Boot Camp to run windows on top of Mac hardware.
In this article are detailed instructions for 2 options for installing NinjaTrader for Mac.
The first is how to install and run virtual machine software, options include:
- Parallels
- VMWare Fusion
The second; how to install and run Apple Boot camp.
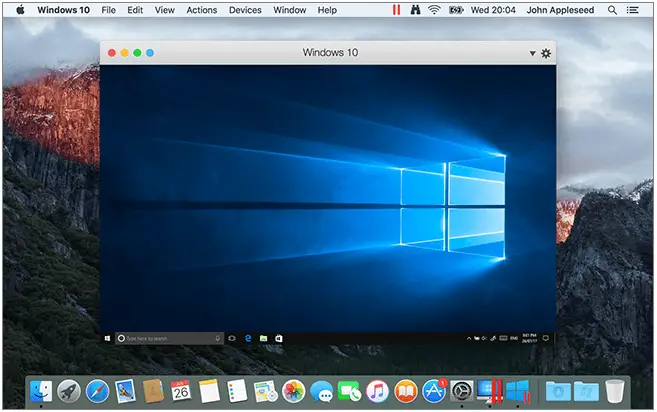
Virtual Machine software allows Mac OS and Windows to run simultaneously. The trade off for using Apple Boot Camp is it requires users to boot their machine to access either Mac OS or windows not both.
It is also worth noting that NinjaTrader on a Mac is not ‘officially’ supported by NinjaTrader, however they have many clients running NinjaTrader software on Mac hardware.
How can NinjaTrader be installed on a Mac using Parallels Desktop? | NinjaTrader for Mac
When installing NinjaTrader on a Mac using Parallels users will need to ensure that the following steps have been taken prior to the installation of NinjaTrader.
How to install Parallels virtual desktop:
- Go to www.parallels.com
- On the home page select ‘Try free’ button. The software comes with a 14 day free trial. You can then choose to purchase for a one time fee.
- Select ‘Download Now’ to download software.
- After download is complete locate installation file on your Mac
- Double Click the ‘Install’ file to start installation
- Follow the prompts by selecting ‘Open’.
- You will be prompted to enter your Mac administrator username and password to give permission to install files.
- Parallels will begin the installation process.
The nice thing about the newer versions of parallels is how easy it is to Install Windows:
- At the ‘Download and Install Windows’ window select ‘Install Windows’. Windows will download and start installing automatically. Download may take 30 minutes depending on your internet connection and installation will depend on the speed of your Mac.
- Once installation is complete select ‘Sign in to continue’ and enter in your parallels account details created at the registration stage previously.
- Complete the registration process by entering email, select ‘new user’ and select ‘Create Account’ you will be prompted to complete ‘Registration’ and select ‘Create account’.
- Check your email to Verify email address and retrieve ‘Activation Key’.
- Return to installation process. Select ‘Done’ and enter the activation key emailed to you and select ‘Activate’.
- The parallels desktop is now ready.
You will still need to Activate “Windows’ and this will come at additional cost; the same as running ‘Windows’ on any PC. You wont need to activate windows immediately. Microsoft is quite lenient with allowing users to access Windows for a small period. As soon as you restart your machine you will be promoted to ‘Activate Windows now’ you can choose to close this window but eventually Windows will need to be activated.
Next you will want to check that sharing is enabled between your Mac and the new Windows desktop virtual machine. To do this:
- Select the “Configure” button on the top bar
- Under “Options”, select “Sharing”
- Uncheck “Share Mac” under “Share Mac User Folders with Windows”
- Press “OK”
Important: To optimize the performance of the virtual machine you need to configure the processor, RAM and Hard drive space allocations between operating systems. See below for details on how to do this.
You can now download and install NinjaTrader as normal. To find out how to download and install NinjaTrader read the post How to use NinjaTrader 8.
Parallels software comes with a 14 day free trial so you can try it out and see if it’s for you. It has a one time purchase cost of $99.99USD. If you’re looking for something simple and easy to use without a lot of configuration then parallels its a good option. Parallels has seen itself emerge as a Virtual Machine market leader in recent times with regular updates and new features that have kept pace with Windows and Mac OS updates.
Important Note – There is a know issue with running NinjaTrader on the parallels virtual machine
Problem Symptoms: Unable to launch NinjaTrader program in my Windows virtual machine. The program crashes on startup
Resolution: Delete an update for Windows (KB2836988) which was installed in your Windows virtual machine.
- Go to ‘Control Panel’ -> ‘Programs’ -> ‘Programs and Features’
- On the right pane choose ‘View installed updates’.
- Locate update for Microsoft Windows (KB2836988)
- Right click and uninstall
- Reboot and launch NinjaTrader
What are the system requirements for running Parallels virtual machine
Hardware:
- A Mac computer with an Intel Core 2 Duo, Core i3, Core i5, Core i7, Intel Core M or Xeon processor
- 4 GB of memory (8 GB better)
- 850 MB of disk space on the boot volume (Macintosh HD) for Parallels Desktop installation
- Additional disk space for virtual machines (varies by operating system installed)
- SSD drive (for better performance)
- Internet connection for product activation and select features
Software:
- macOS High Sierra 10.13 or later
- macOS Sierra 10.12.5 or later
- OS X El Capitan 10.11.6 or later
- OS X Yosemite 10.10.5 or later
How can NinjaTrader be installed on a Mac using VMWare Fusion virtual machine?
When installing NinjaTrader on a Mac using VMWare Fusion users will need to ensure that the following steps have been taken prior to the installation of NinjaTrader.
How to Install VMWare Fusion virtual machine
- Go to www.vmware.com
- On the home page at the left hand side select ‘products’. Under personal desktop select ‘Fusion for Mac’. Select ‘Download Now’ .
- In the new page select VMWare Fusion ‘Download Now’ to download software and select download location.
- After download is complete locate installation file on your Mac
- Double Click the ‘Install’ file to start the installation
- Follow the prompts by selecting ‘Open’.
- You will be prompted to enter your Mac administrator username and password to give permission to install files.
- Read the agree to the Terms and conditions
- If you already have a VMWare Fusion License key enter it here. Or you can choose to buy a key or try a 30 day free trial.
- You will be prompted again to enter your Mac administrator username and password to give permission to make changes.
Next you need to select the installation method to install Windows onto your virtual machine. This is where you will need a windows installation files from disc or ISO image file. To find out how to get an ISO file click here.
- At the ‘Select the Installation Method’ window select the default setting which should be ‘Install from disc or image’ the ‘Continue’.
- If you have your Windows disc or ISO image file ready drag and drop it into the window and select ‘continue’
- Select ‘Finish’ if you are happy with the virtual machine summary
- To begin installation select the ‘Play’ button in the virtual machine window. Windows setup will begin.
The VMWare Fusion virtual machine is now installed. To enhance the performance of the virtual machine and allow greater connectivity between your Mac OS and Windows virtual machine, also install VMWare tools.
To Install VMWare Tools:
- Select the ‘Virtual Machine’ menu in the top bar and select ‘Install VMWare Tools’ to start the installer.
- When Autoplay comes up choose the option to run VMWare tools.
- Follow the prompts to install the tools
- The VMWare Fusion installation is complete
Lastly, you want to check that sharing is enabled between your Mac and the new Windows desktop virtual machine. To do this:
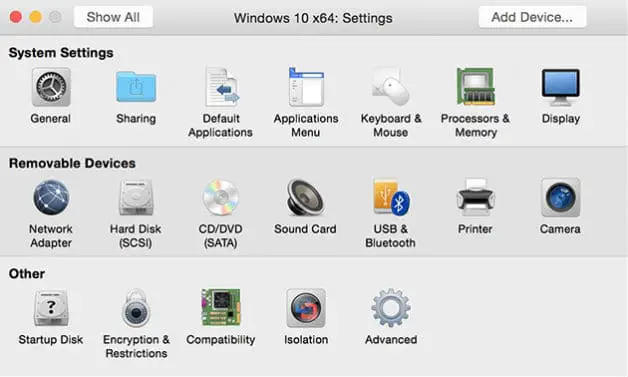
- Select the ‘Virtual Machine’ menu then ‘Settings’.
- Select “Sharing”
- Uncheck “Documents” from “Mirrored Folders” List
- Close the ‘Settings’
Important: To optimize the performance of the virtual machine you need to configure the processor, RAM and hard drive allocations between operating systems. See below for details on how to do this.
Now you have ‘Windows’ running on your Mac OS. You can now download and install NinjaTrader as normal. Find out how to download and install NinjaTrader here.
VMWare Fusion software comes with a 30 day free trial. It has a one time purchase cost of $149 USD.
What are the system requirements for running VMWare Fusion
Hardware requirements:
- All Macs launched in 2011 or later are supported except:
2012 Mac Pro “Quad Core” using the Intel Xeon W3565 Processor. - In addition the following are supported:
2010 Mac Pro “Six Core”, “Eight Core” and “Twelve Core”. - Minimum 4 GB of RAM
- 750 MB of free disk space for VMware Fusion and at least 5 GB for each virtual machine
Software requirements:
- OS X 10.11 or later
- Operating system installation media (disk or disk image) for a virtual machine
How to allocate processing power, RAM and memory between operating systems?
To run NinjaTrader on top of your virtual machine you need to ensure that your system is configured to allocate enough processing power, RAM and Hard drive space to support NinjaTrader. Click here to check the minimum NinjaTrader system requirements
Running dual operating systems side by side divides the processing power and ram between Mac OS and Windows virtual machine. You need to decide how much of these resources to allocate to each OS. To adjust these allocations follow these steps:
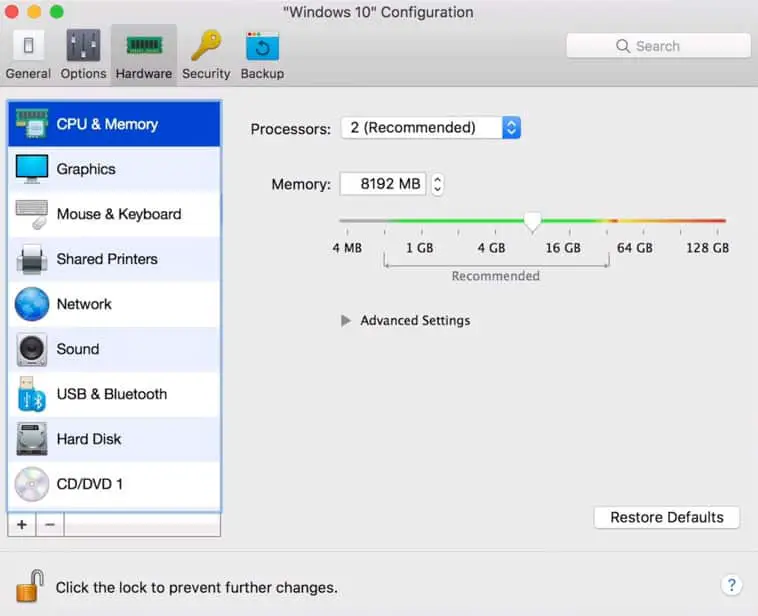
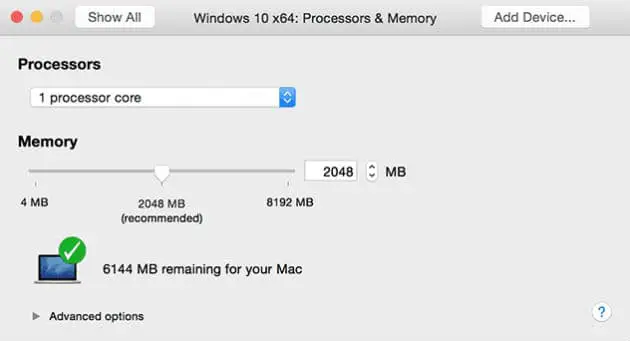
- Select the ‘Configure’ button on the top bar for Parallels and the ‘Virtual Machine’ menu then ‘Settings’ for VMWare Fusion.
- Within ‘CPU & Memory’ or ‘Processors & Memory’ adjust the number of processors and the amount of RAM to allocate to your virtual machine.
How can NinjaTrader be installed on a Mac using Apple Boot Camp?
- Download Windows ISO – The first thing you want to do is to download the Windows ISO, this will allow you to install windows on your Mac. Click here to download disc image from Microsoft if you don’t already have one.
- Configure Boot Camp Assistant – Open the finder -> Applications -> Utilities. In Utilities you should see the Boot Camp Assistant App -> Open this App
- Select ISO – Once the Boot Camp Assistant App is open, select ‘Continue’. Then in the ‘Install Window’ window, select ‘Choose’ next the ISO image box. Find your Windows ISO file that you have from step 1 and select ‘Open’.
- Partition Drive – Next you want to designate the space to allocate to your Mac OS and Windows. Use the slider to partition the drive. Refer to Ninja Trader system requirements to ensure enough space is allotted to Windows.
- Install Windows – Select ‘Install’. Enter your Mac admin details when prompted. Then it will reboot into your new Windows setup.
- Windows will prompt you to enter in preference information.
- Then ask you for your Windows product key. If you don’t have a product key you don’t have to enter it in straight away, in which case just select ‘I don’t have a product key’. You can choose to activate at a later date.
- Select the Windows product you want to use. ‘Windows Home’ is all you really need for running NinjaTrader. Select ‘Next’ then read and agree to the Terms and Conditions. The installation process will complete. This takes a while then your machine will reboot.
- On start up you can choose to ‘use express setting’ or ‘customize’ choose what you prefer.
- Windows will then ask you to setup an account
- Run Boot Camp Installer – On startup you will see the Boot Camp Installer. Click ‘Next’. Read and ‘Agree’ to the License agreement. It will then install Boot Camp. This will install all the drivers needed to work with your hardware. Once complete select ‘Finish’ and system will reboot.
- Connect to Wifi – Connect to Wifi in your wifi icon on the toolbar.
- Run Apple Software Update – In the ‘Start’ menu select ‘Apple Software Updates’. This will install addition updates it requires from internet. Reboot again.
- Runs Windows Update – In the ‘Start’ menu go to ‘Settings’ then ‘Update & Security’ select ‘Windows Update’ and it will check for any windows updates. Once complete select ‘restart now’ and windows will make its final updates and installs.
- Once the system has restarted windows is ready to use.
- Install NinjaTrader as normal. To find out how to download and install NinjaTrader click read the post How to install NinjaTrader 8.
How to switch between Mac OS and Windows using Apple Boot Camp
There are two ways to switch between Mac OS and Windows:
- From Windows go to the systems tray icon on the right hand side of toolbar (upward pointing arrow). Select Boot Camp Icon -> restart in mac OS. From Mac OS go to ‘System preferences’ select ‘Startup Disc’ -> ‘Authenticate’ by entering password. Then can select ‘BOOTCAMP Windows’ ->’Restart’. this will then reboot the system into Windows.
- An easier way is to restart the computer and hold the ‘Option’ key down. On restart you will be give the opportunity to select which OS you want to restart into.
Apple Boot Camp software comes as standard with Mac OS. Its obvious disadvantage is you can’t run two systems simultaneously. If the convenience of this is an important feature then running a virtual machine setup like Parallels or VMWare would be a better option in my personal opinion. Otherwise Apple Boot Camp enables Windows and NinjaTrader to be run on your Mac hardware for Free.
Since NinjaTrader doesn’t require huge amounts of processing power there shouldn’t be an issue using either VM or Apple boot Camp software. If you prefer more processing power; Apple Boot Camp is the better option. Refer to the minimum system requirements for NinjaTrader also VM products.