TradingView is one of my favorite charting platforms. Tradingview offers loads of user friendly features. One such feature in the Tradingview stop loss and trailing stop.
One of my favorite features is the ability to trade from the TradingView charts. In this post I’ll describe in detail how to place a Tradingview stop loss and Tradingview trailing stop loss using the platform.
Signup for a Essential, Plus+ or Premium TradingView subscription using the link. *New users get $15 towards a new plan.
What is the stop order on TradingView?
One of TradingView’s order types is the stop order.
TradingView’s stop order is like a typical stop order where a market order is automatically placed/triggered once a security’s price hits the stop price set by the trader.
Stop orders can often be confused with limit orders.
In a nutshell, the main difference between the two is that limit orders can only be filled at the limit price (or better), while stop orders will be automatically executed at the current market price once a stop is triggered regardless of whether that price is worse than the stop price.
Stop orders are typically designed to protect your position through limiting potential losses. This is why every trader should understand its value.
To find out more about setting a Tradingview stop order see the section below.
Where is the stop loss on TradingView?
Stop loss, along with take profit, are add-on risk management features on TradingView’s orders.
TradingView’s stop loss feature is located on the order panel. This panel is denoted by the up and down arrow located on the toolbar. See black arrow and box below.
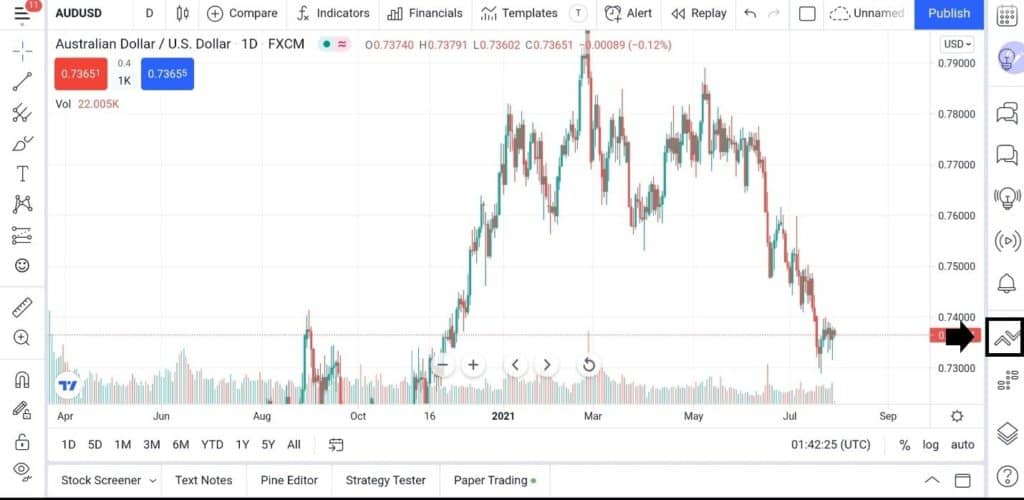
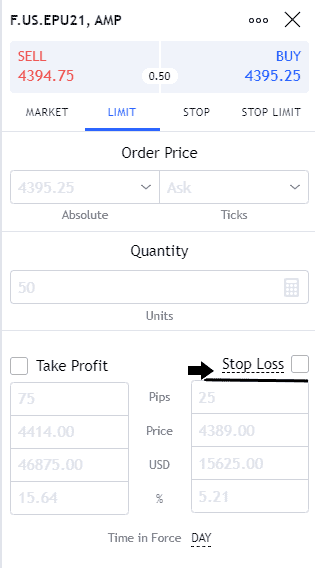
On the order panel, you will see the stop loss box (see black box below) under all the order types – market, limit, stop, stop limit. See blue box below
As seen in the screenshot, you can see that the platform supports pips, price, dollar, and percentage-based stops. More on these later. (See black box below).
How do I create a stop loss in TradingView?
Overview of stop loss components
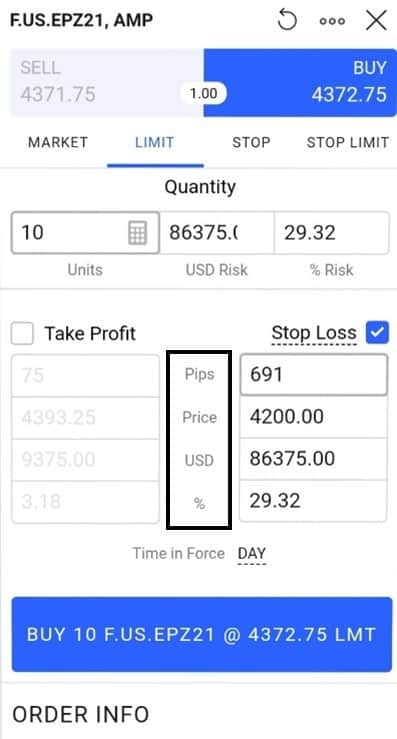
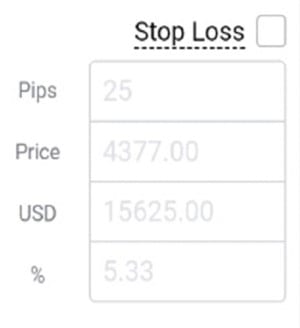
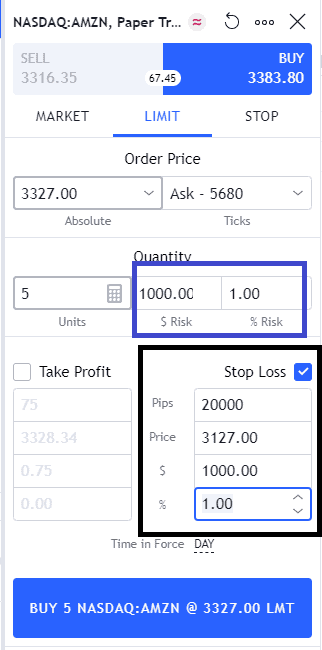
TradingView makes it easy to create stop losses. All it takes is filling out one of a four-field order form. Here are the components of the order form:
- Pips
- Set a pips-based stop loss by determining the maximum pip movement you are willing to accept when the trade goes against your position.
- Price
- Set a price-based stop loss by determining the lowest (for longs) or highest (for shorts) price that represents your maximum loss for that position.
- USD value ($)
- Set a dollar-based stop loss by determining the maximum dollar loss you are willing to accept for that position.
- Percentage (%)
- Set a percentage-based stop loss by determining the maximum percentage loss on the position.
- It’s important to mention that the percentage refers to the position on the specific security, not the account balance or capital.
The platform makes filling the stop order even easier by only requiring the user to fill out one field then Tradingview automatically calculates the equivalent value on the remaining three.
For example, you can fill out Price (or stop price) then the platform will automatically fill Pips, USD, and %.
Creating a stop loss
Step 1: Open the Order Panel
Generally, there are two ways to open the Order Panel.
- Option 1: Click the up and down arrow on the right toolbar
- Option 2*: Click on Trading Panel > Click pencil icon to modify existing order on Order Panel. See black box and arrow in screenshot below:

- Option 3*: Double click on the ‘Quantity’ figure on the floating position/order button. See screenshot below:
*Note: These options are available only when there is an active order or position
Step 2: Tick Stop Loss box. See black box below:
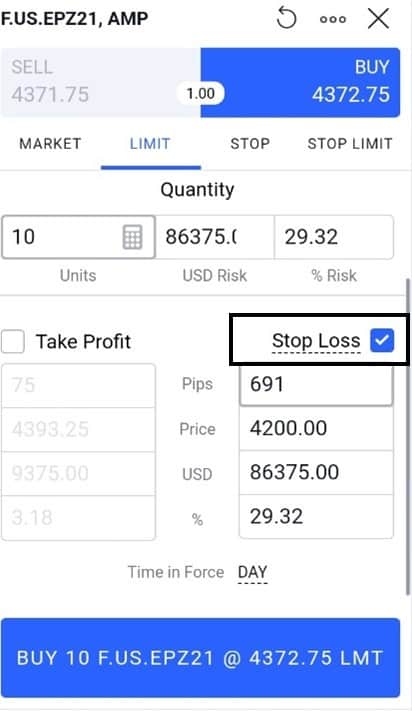
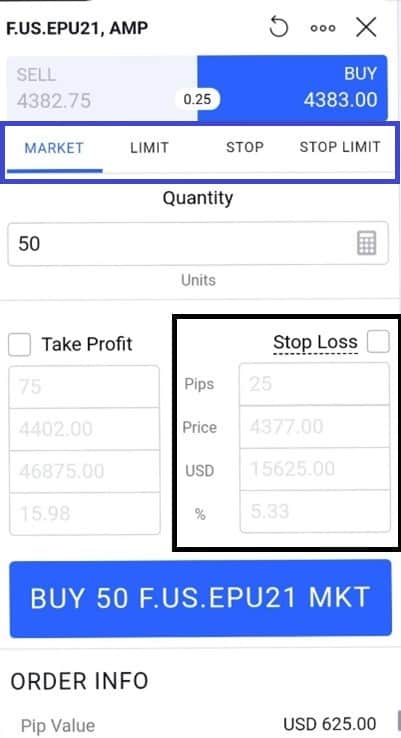
Step 3: Fill only one of the four fields (Pips, Price, $, %)
Step 4: Confirm your stop loss by clicking the ‘red’ button (for setting stop losses on active orders) or the ‘blue’ button (for adding a stop loss to a new order).
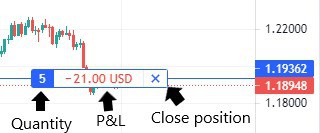
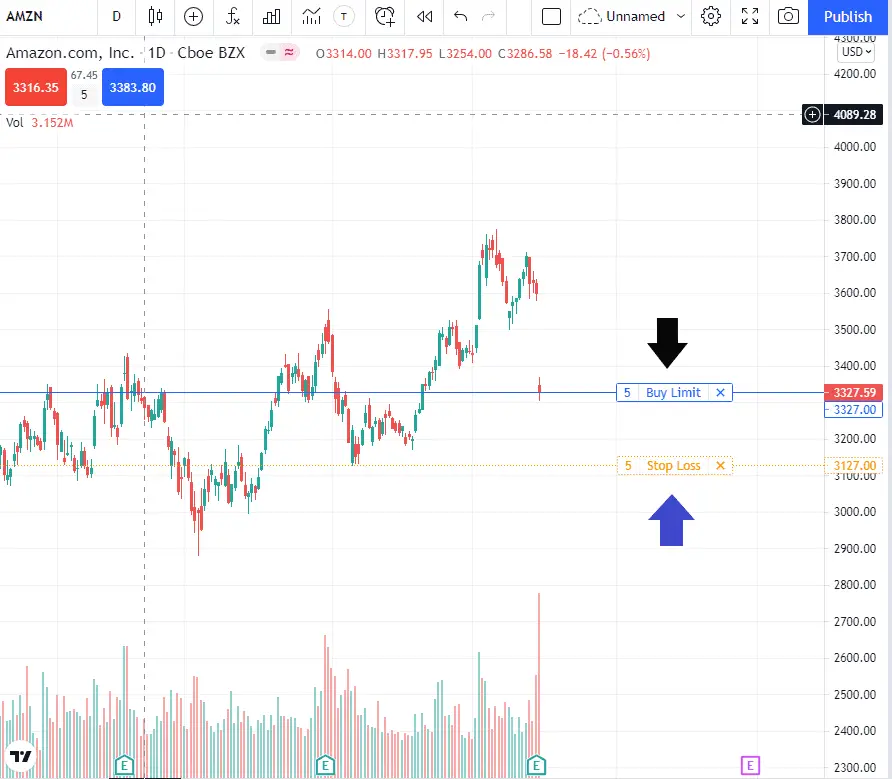
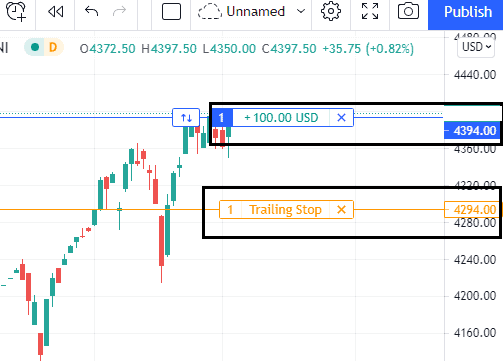
The sample below shows an active buy order with an added stop loss.
In this example, I only filled the % field with 1.00. The platform, then, automatically showed the equivalent of 1% in Price, Pips, and Dollar terms.
TradingView will show a risk summary in dollar and % terms(see blue box above) once you have filled up the stop loss order. Once the order is posted, the stop loss and limit order will show up on the chart with helpful annotations (see below).
Modifying a stop loss
Option 1: Drag and drop
- You can drag the stop loss box on the chart, move it up or down, then drop it on the desired price.
- To do this, hover on the box then grab.
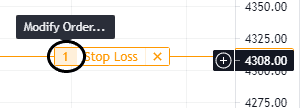
Option 2: Modify button
- On the same box, click on the quantity value on the box. This will open the order panel. See circle below:
Signup for a Essential, Plus or Premium TradingView subscription using the link. *New users get $15 towards a new plan.
Signup for a Essential, Plus+ or Premium TradingView subscription using the link. *New users get $15 towards a new plan.
How do you set a TradingView trailing stop?
What is a trailing stop?
Trailing stops are designed to help traders to keep active and profitable trades open while price is moving in favor of the trader.
Does my Tradingview broker support the Trailing Stop feature?
It depends.
Before we get started, it is important to note that not all TradingView accredited brokers support the trailing stop functionality. Additionally, some brokers only support the feature on certain securities.
Tip: To know whether your broker supports this feature, here’s a quick tip:
Step 1: If you have not already, connect your broker
- Step 1.2: Open chart > Go to the bottom panel
- Step 1.3: Click ‘Trading Panel’
- Step 1.4: Choose your broker > log-in
Step 2: Open Order Panel
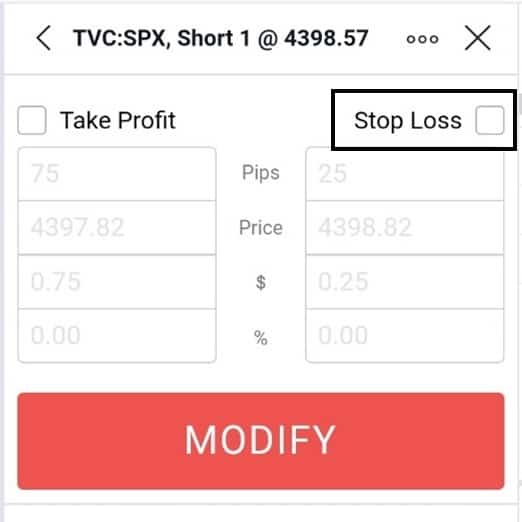
Step 3: Locate the Stop Loss tick box >
*If there is a dotted underline on the Stop Loss title, your broker supports the feature.
*If not, your broker does not support the feature.
How to add a Trailing Stop
Step 1: Click Stop Loss title This will open a dropdown
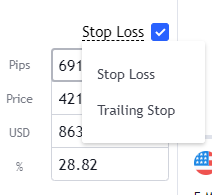
Step 2: Select Trailing Stop. The title should quickly switch from Stop Loss to Trailing Stop
Step 3: Fill one field (either Pips, Price, USD, %). The chart should reflect two prices: Entry Price and Trailing Stop. See black boxes below.
Understanding the Trailing Stop and its Components
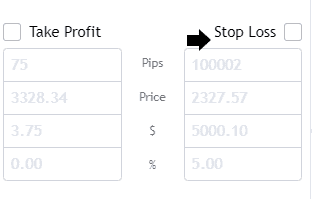
Like the stop loss feature, TradingView’s trailing stop also has the four-field order form. You only need to fill one of these components:
- Pips
- Price
- USD ($)
- Percentage (%)
The main difference between trailing stop and stop loss is that the trailing stop is dynamic while the stop loss is static. This means that the trail stop will move when price moves in the trades favor.
The trailing stop is a stop order that moves upward (for longs) as the price rises. The movement or the “trail” of the stop will be determined by the maximum distance (in pips, price, USD, or percentage) of the stop from your entry price.
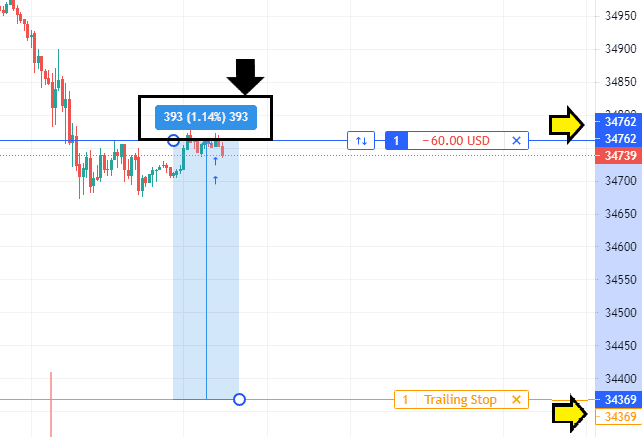
TradingView Trailing Stop Example
For easier illustration, I used the pips option as an example below:

The trailing stop will be placed a maximum of 400 pips away from the entry price.
For illustration purposes, I used TradingView’s price range tool to measure the pip distance of the entry price and trailing stop. See black box and arrow below for the pips value.
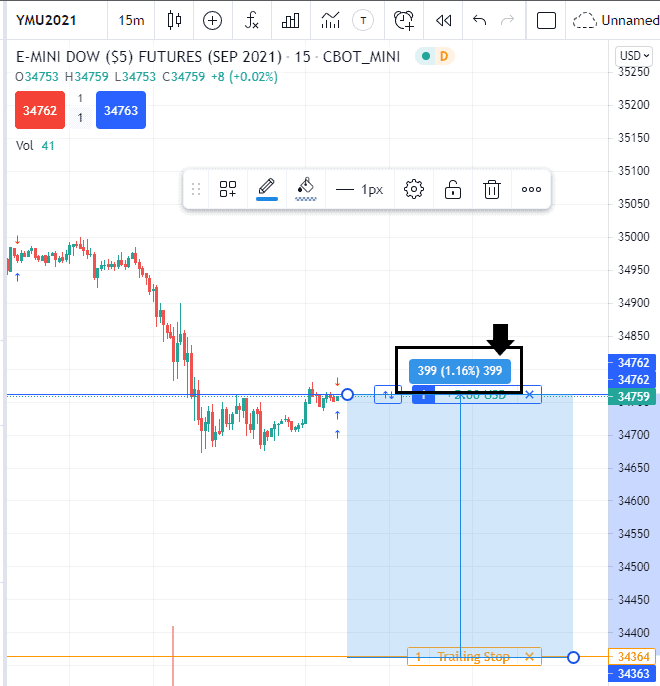
As price moves in the positions favor, the trail stop will automatically move up in increments – the distance between ‘current price’ and the trailing stop will be bridged by 400 pips.
The distance between the ‘entry price’ and trailing stop reduces from 400 to 393 pips when price moves in the positions favor.
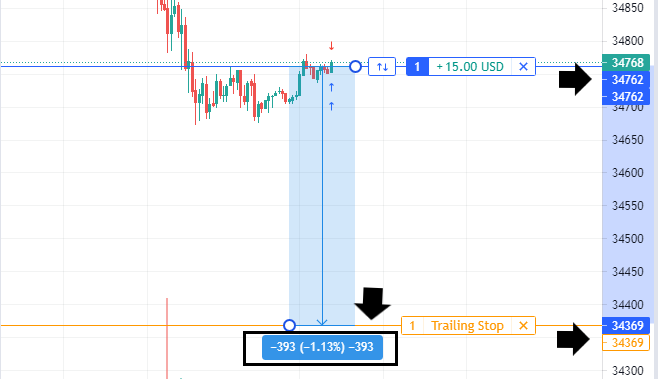
However, as the position loses ground, the trail stop will not move from its last position. See example below for the same trade.
The trailing stop did not move from $34,369. The same price as the previous illustration when the position gained.
Signup for a Essential, Plus+ or Premium TradingView subscription using the link. *New users get $15 towards a new plan.
Signup for a Essential, Plus or Premium TradingView subscription using the link. *New users get $15 towards a new plan.