In this post I will explain how to use the TradingView Go to date function. This tool is an excellent method to quickly and easily jump to specific date or time of interest on any chart.
To use the TradingView Go to date tool. Simply locate the ‘Go to’ icon on any chart bottom menu. Then select the dates to ‘Go to’.
In the following sections I’ll explain in more detail how to best use the Go to function. I’ll also share some tips and tricks about how to get the most out of the tool.
Signup for a Essential, Plus+ or Premium TradingView subscription using the link. *New users get $15 towards a new plan.
TradingView go to date function
Often traders like to view the price action of a specific time period or date.
Typically this involves manipulating the chart by changing timeframes, manually scrolling the date scale, zooming in and out, scaling the chart vertically to view candlesticks then finally marking the chart bar or time period of interest.
Thankfully, TradingView has a really nice built in ‘Go to’ function that helps solves this issue.
The TradingView Go To date function allows users to quickly and easily jump to any specific date.
In the following section I’ll explain how to use this function and how to get the most out of it:
How to jump to a date in TradingView?
If you want to use the TradingView Go to date tool. The following is step by step guide to using the function:
Step 1: Select the correct timezone
The first important thing to mention is timezone. To be sure you’re jumping to the correct date and time. First make sure your chart is set to the correct timezone.
I’ve written a detailed post about setting your TradingView timezone correctly here.
Step 2: Select timeframe
If you know your preferred timeframe. It’s a good idea to set your chart to that timeframe before jumping to a specific date.
I personally like setting my chart to a smaller timeframe than the one I typically use. This helps enhance the resolution of the area I’m looking at. i then mark the area as a shaded zone. I’ll discuss this in more detail later.
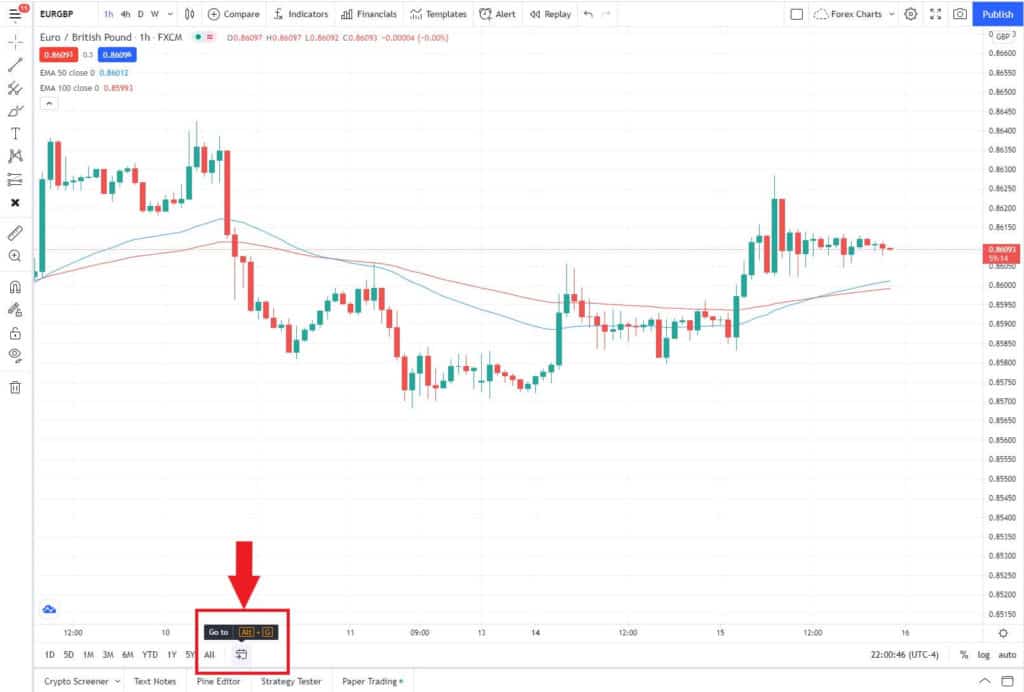
Step 3: TradingView Go To date function location
The TradingView Go to function is located in the chart interface left side of the bottom bar menu. See the figure below.
Step 4: Select time and date
Once your chart bars are set to your preferred timeframe.
Select the TradingView ‘Go to’ function.
The Go to function settings window will appear.
There are two main date selection settings that can be made. Either a precise date and time or Custom range.
Step 4a: Go to a precise ‘date’ and time
To select a precise date and time. Have ‘Date’ selected in the top tab.
In the fields enter the date and time.
Note: The date and time entered are the bar open.
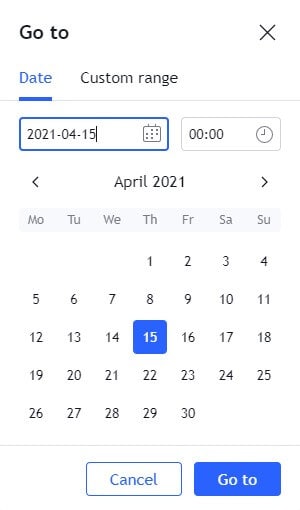
Once you have selected your required dates select ‘Go to’. Your chart will jump to the date selected.
Tip: What I’ve noticed is that for timeframes below 1hr the TradingView Go to function will ‘Go to’ a bar 30 minutes before the time selected.
Step 4b: Go to a ‘Custom range‘
The second method for ‘Go to’ date. Is to select a specific date range.
This is a better method for identifying a range of dates.
To ‘Go to’ a date range. Select ‘Custom range’ in the top menu of the ‘TradingView ‘Go to’ menu.
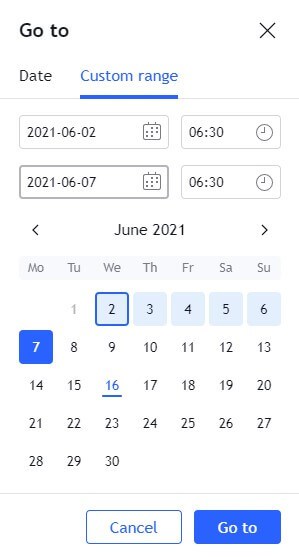
In the fields enter the range start date and time then the range finish date and time.
The selected date and time range will span the width of the chart.
Tip: Using ‘Custom range’ seems to work best for day ranges greater than 5 days. Any less and the date and time range selected doesn’t span the exact width of the chart.
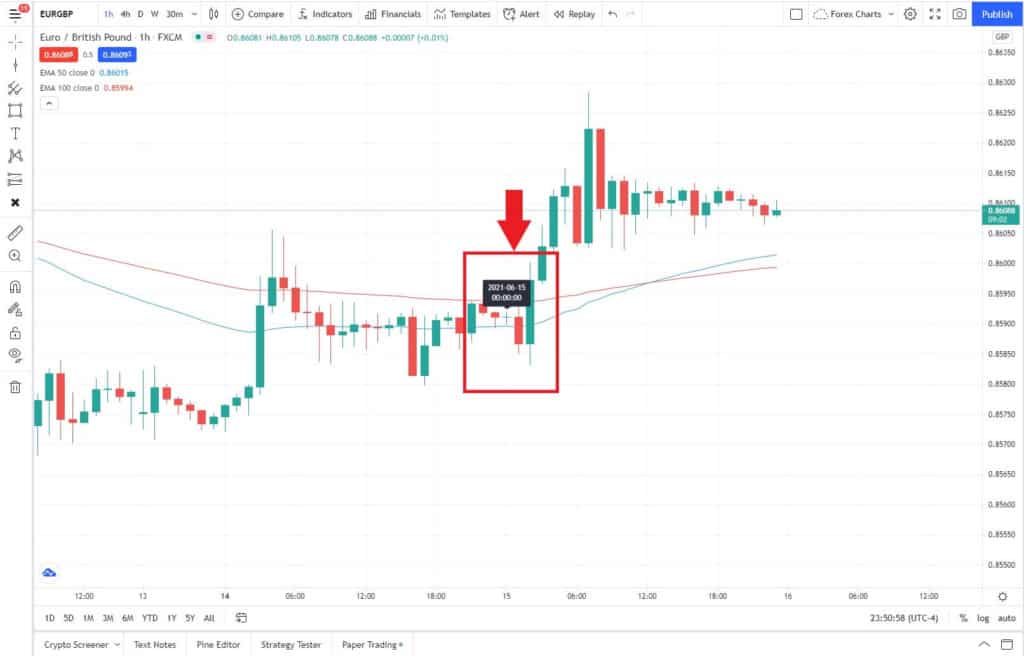
Step 5: Marking location
Using the ‘Date’ search function a label will appear on your chart at that date and time. problem is as soon as you move your chart. It disappears.
Therefore, Once you’ve located the date and time location on your chart. It’s a good idea to mark the location in some way.
You can use a vertical line tool but I prefer using a shaded area such as the ‘rectangle’ or ‘date and price range’ tools. I prefer the ‘date and price range’ tool.
Marking your location with a shaded area scales across multiple timeframes much better.
To mark a location with the ‘date and price range’ tool. Go to the ‘Prediction and Measurement Tools’ in the chart side bar menu. Select the ‘Date and Price Range’ tool.
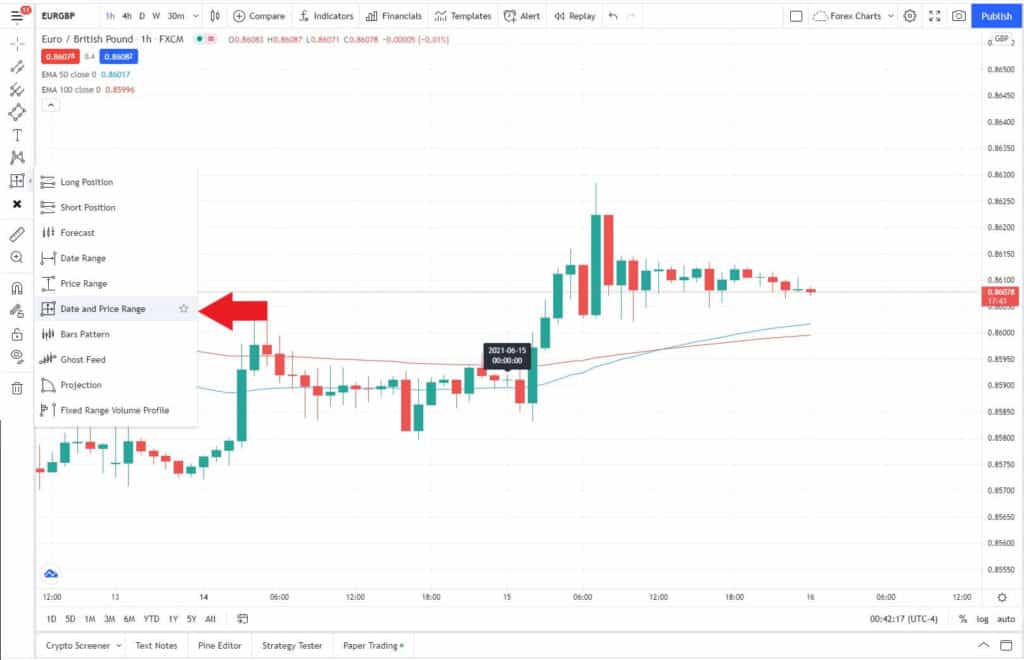
Select the area you want to highlight using the ‘Date and Price Range’ tool.
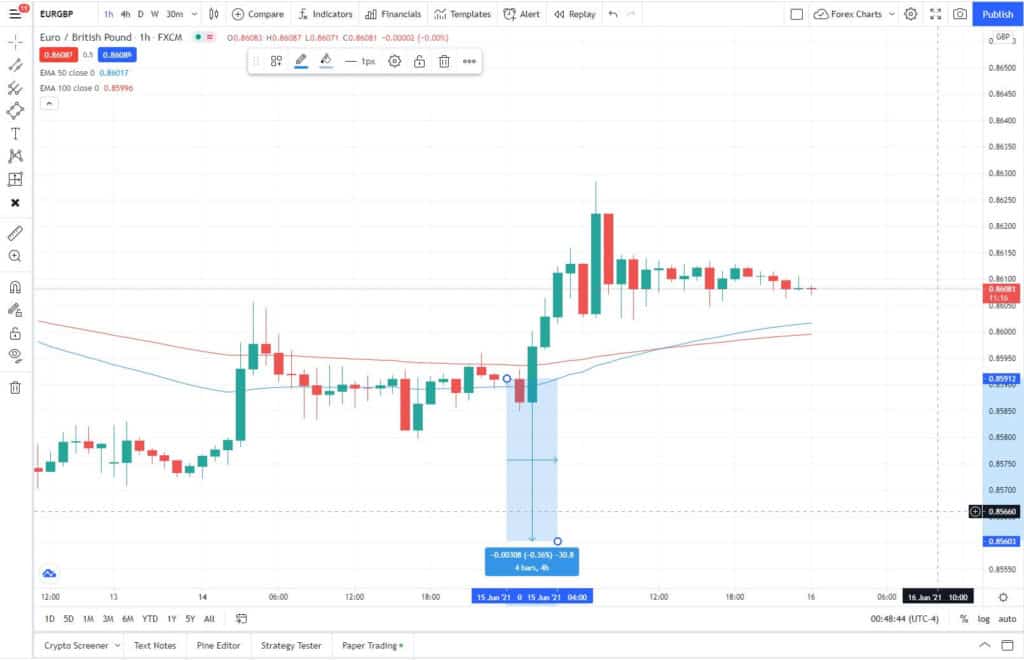
Once you have selected the correct pricing range. Go to the tool ‘settings’ and extend the height of the area.
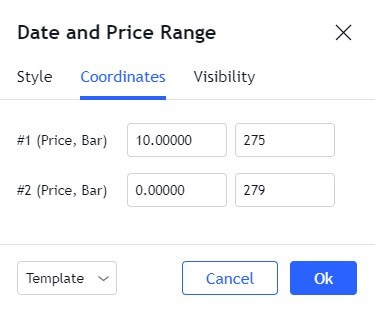
To extend vertically I simply select an arbitrary large number for the high range and ‘0’ for the low range.
Also note that you can set the width of the area by selecting the start and end bar number!
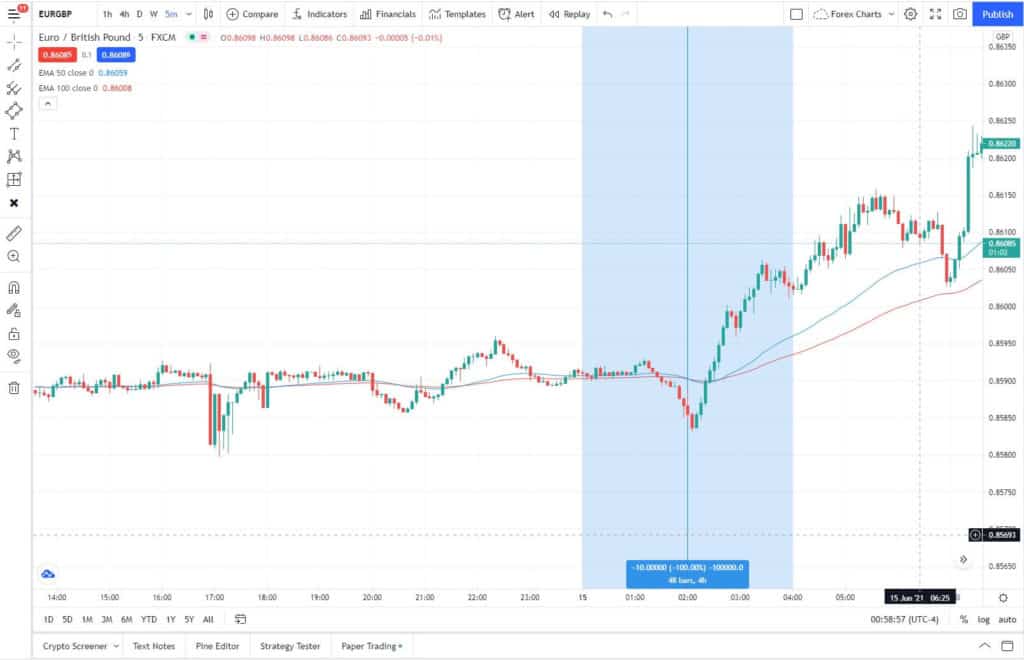
Now if we change timeframes our highlighted area scales with the chart! See figure below.
Signup for a Essential, Plus+ or Premium TradingView subscription using the link. *New users get $15 towards a new plan.